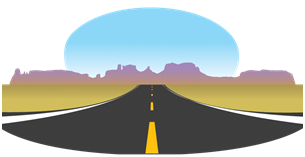
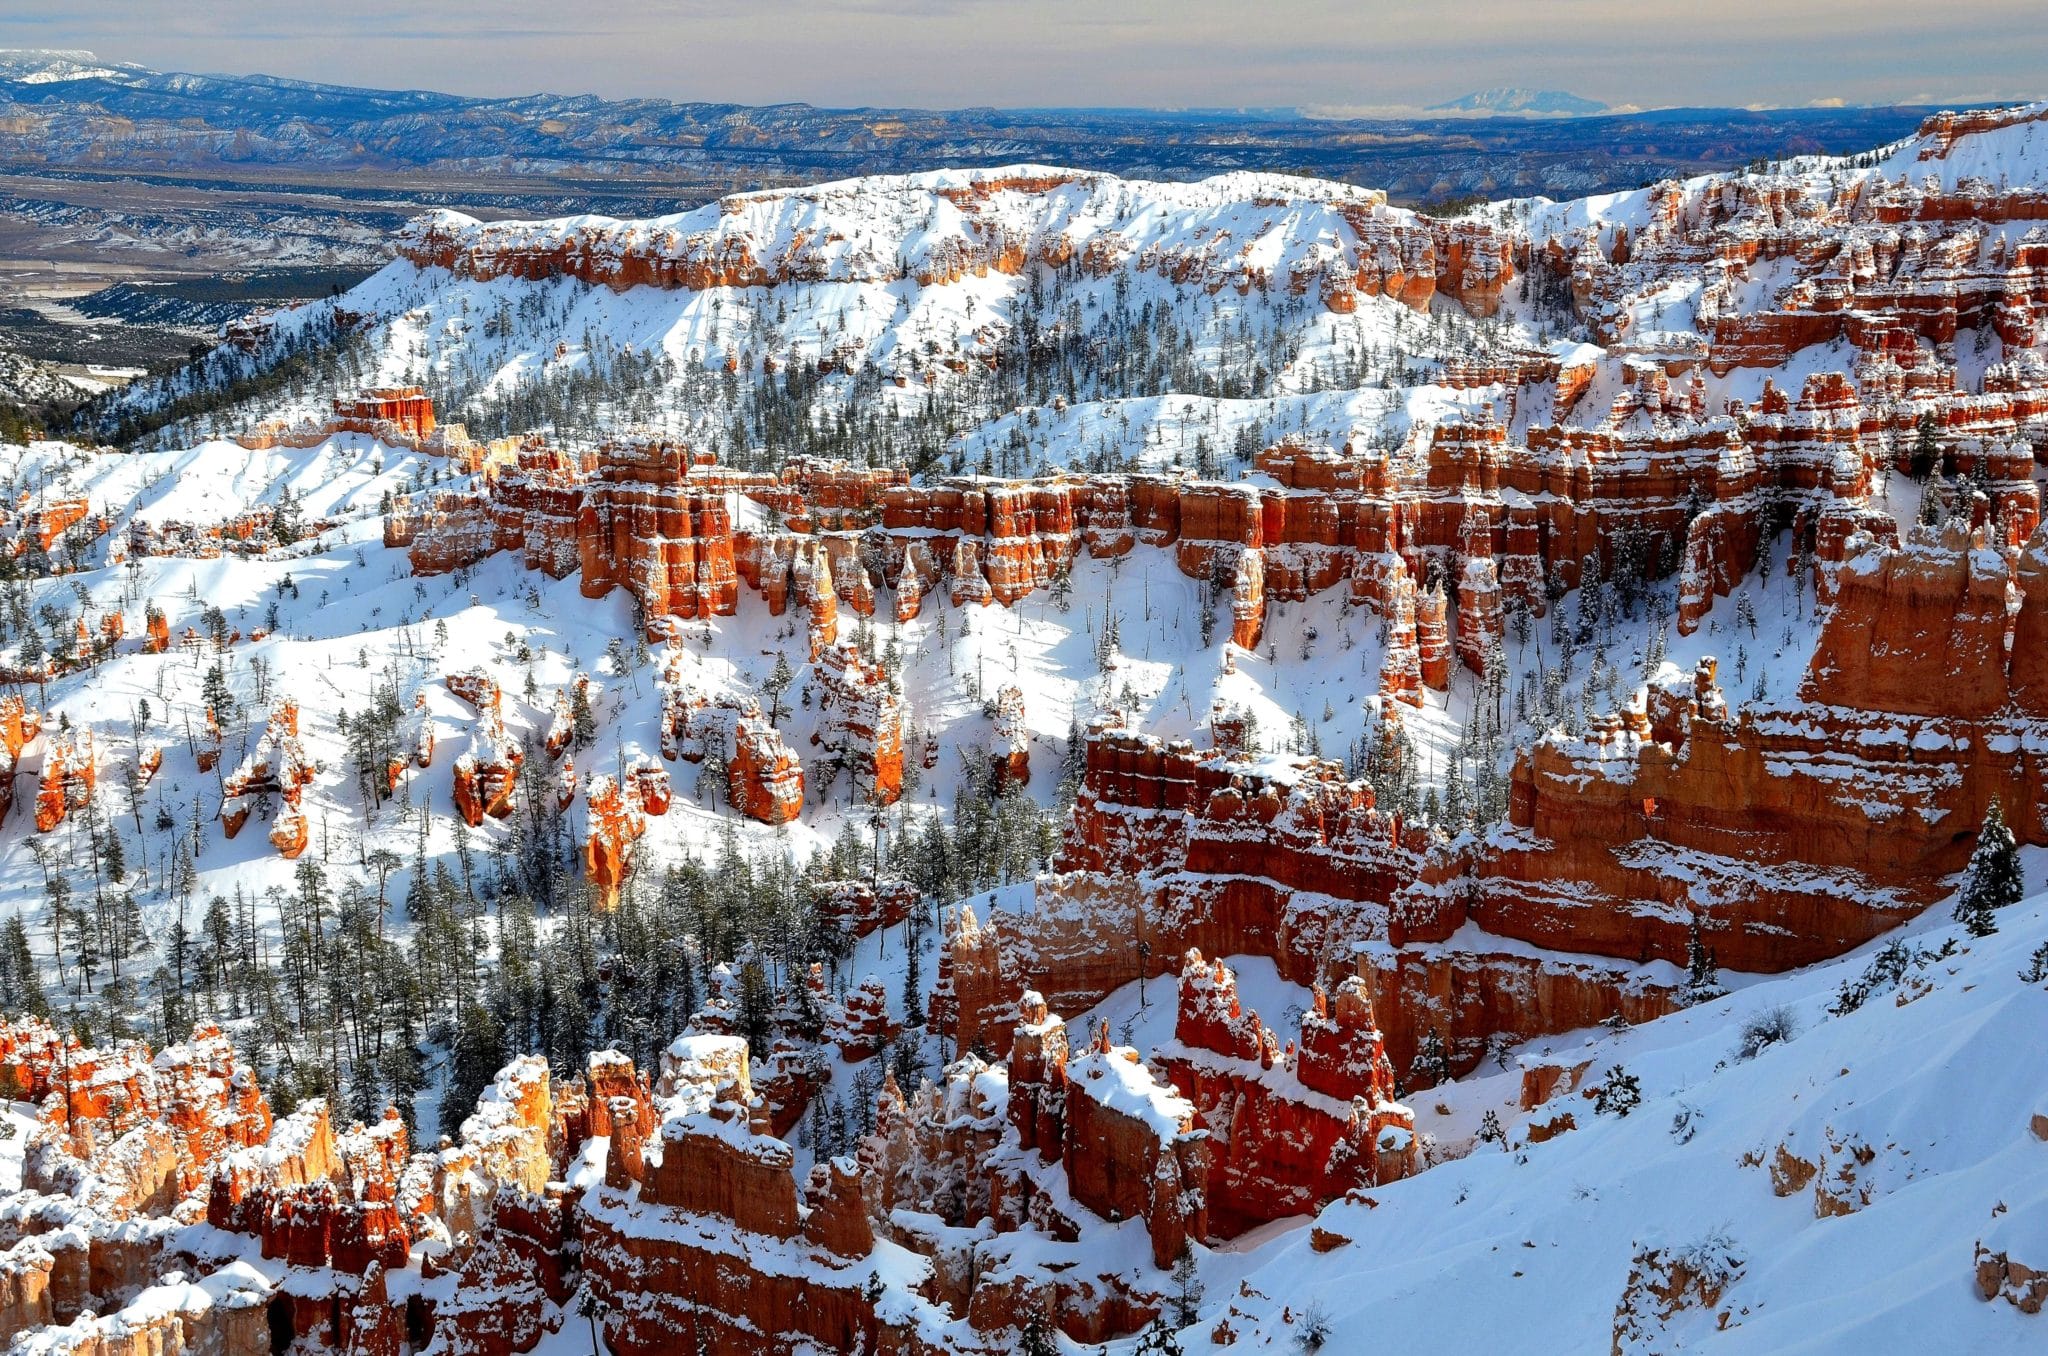

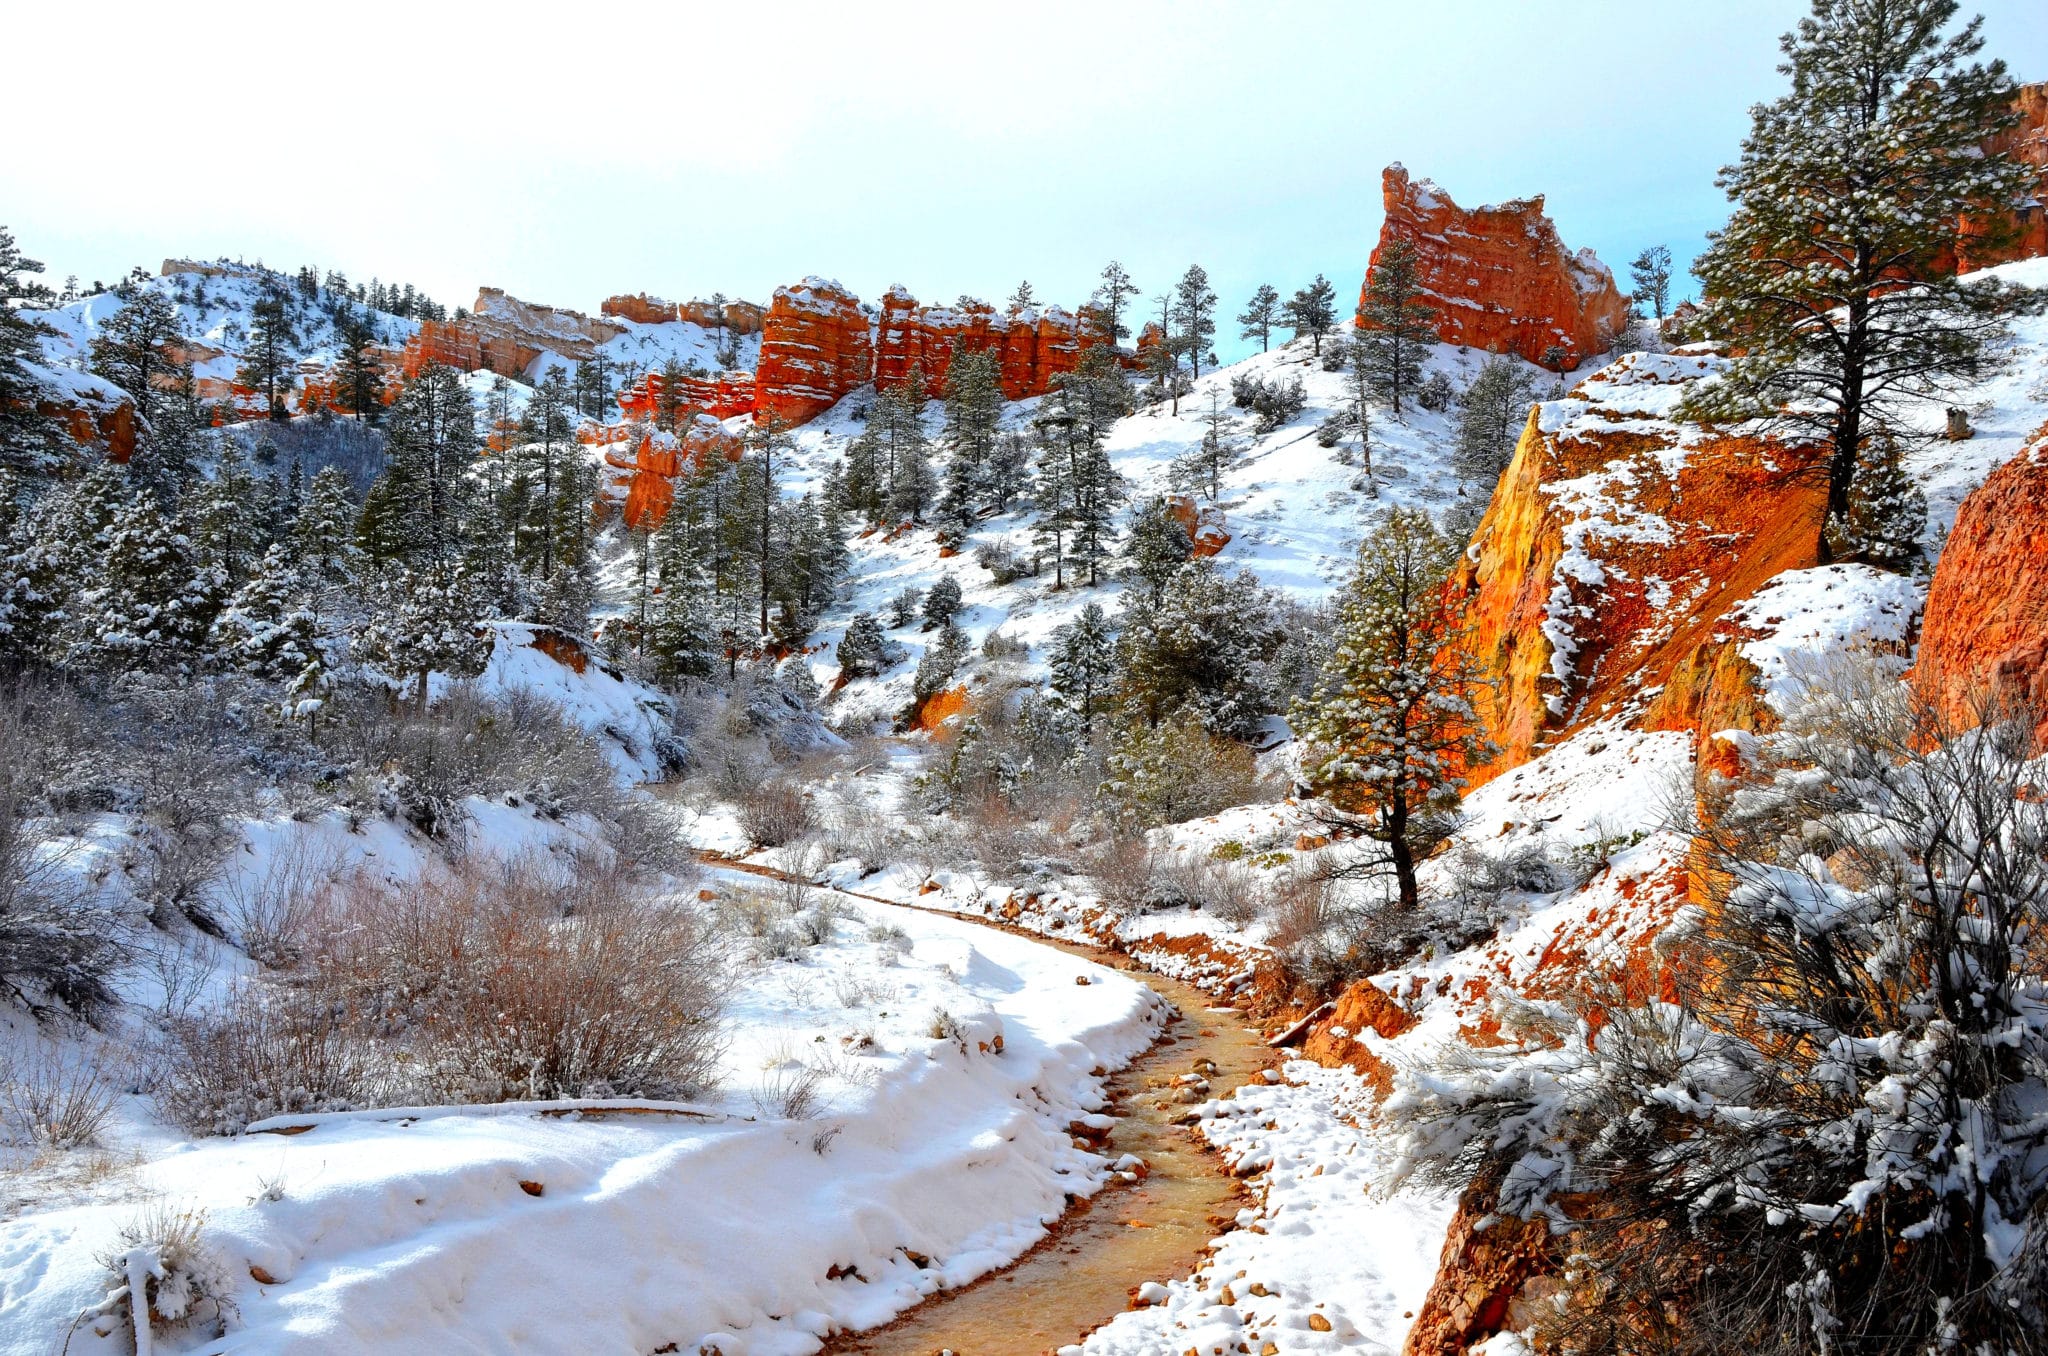
FEATURED PHOTO of Bryce Canyon in winter by Tom Dell
This week we aim our headlights at Bryce Canyon — second in our series on Utah’s magnificent national parks.
Zion to Bryce Canyon
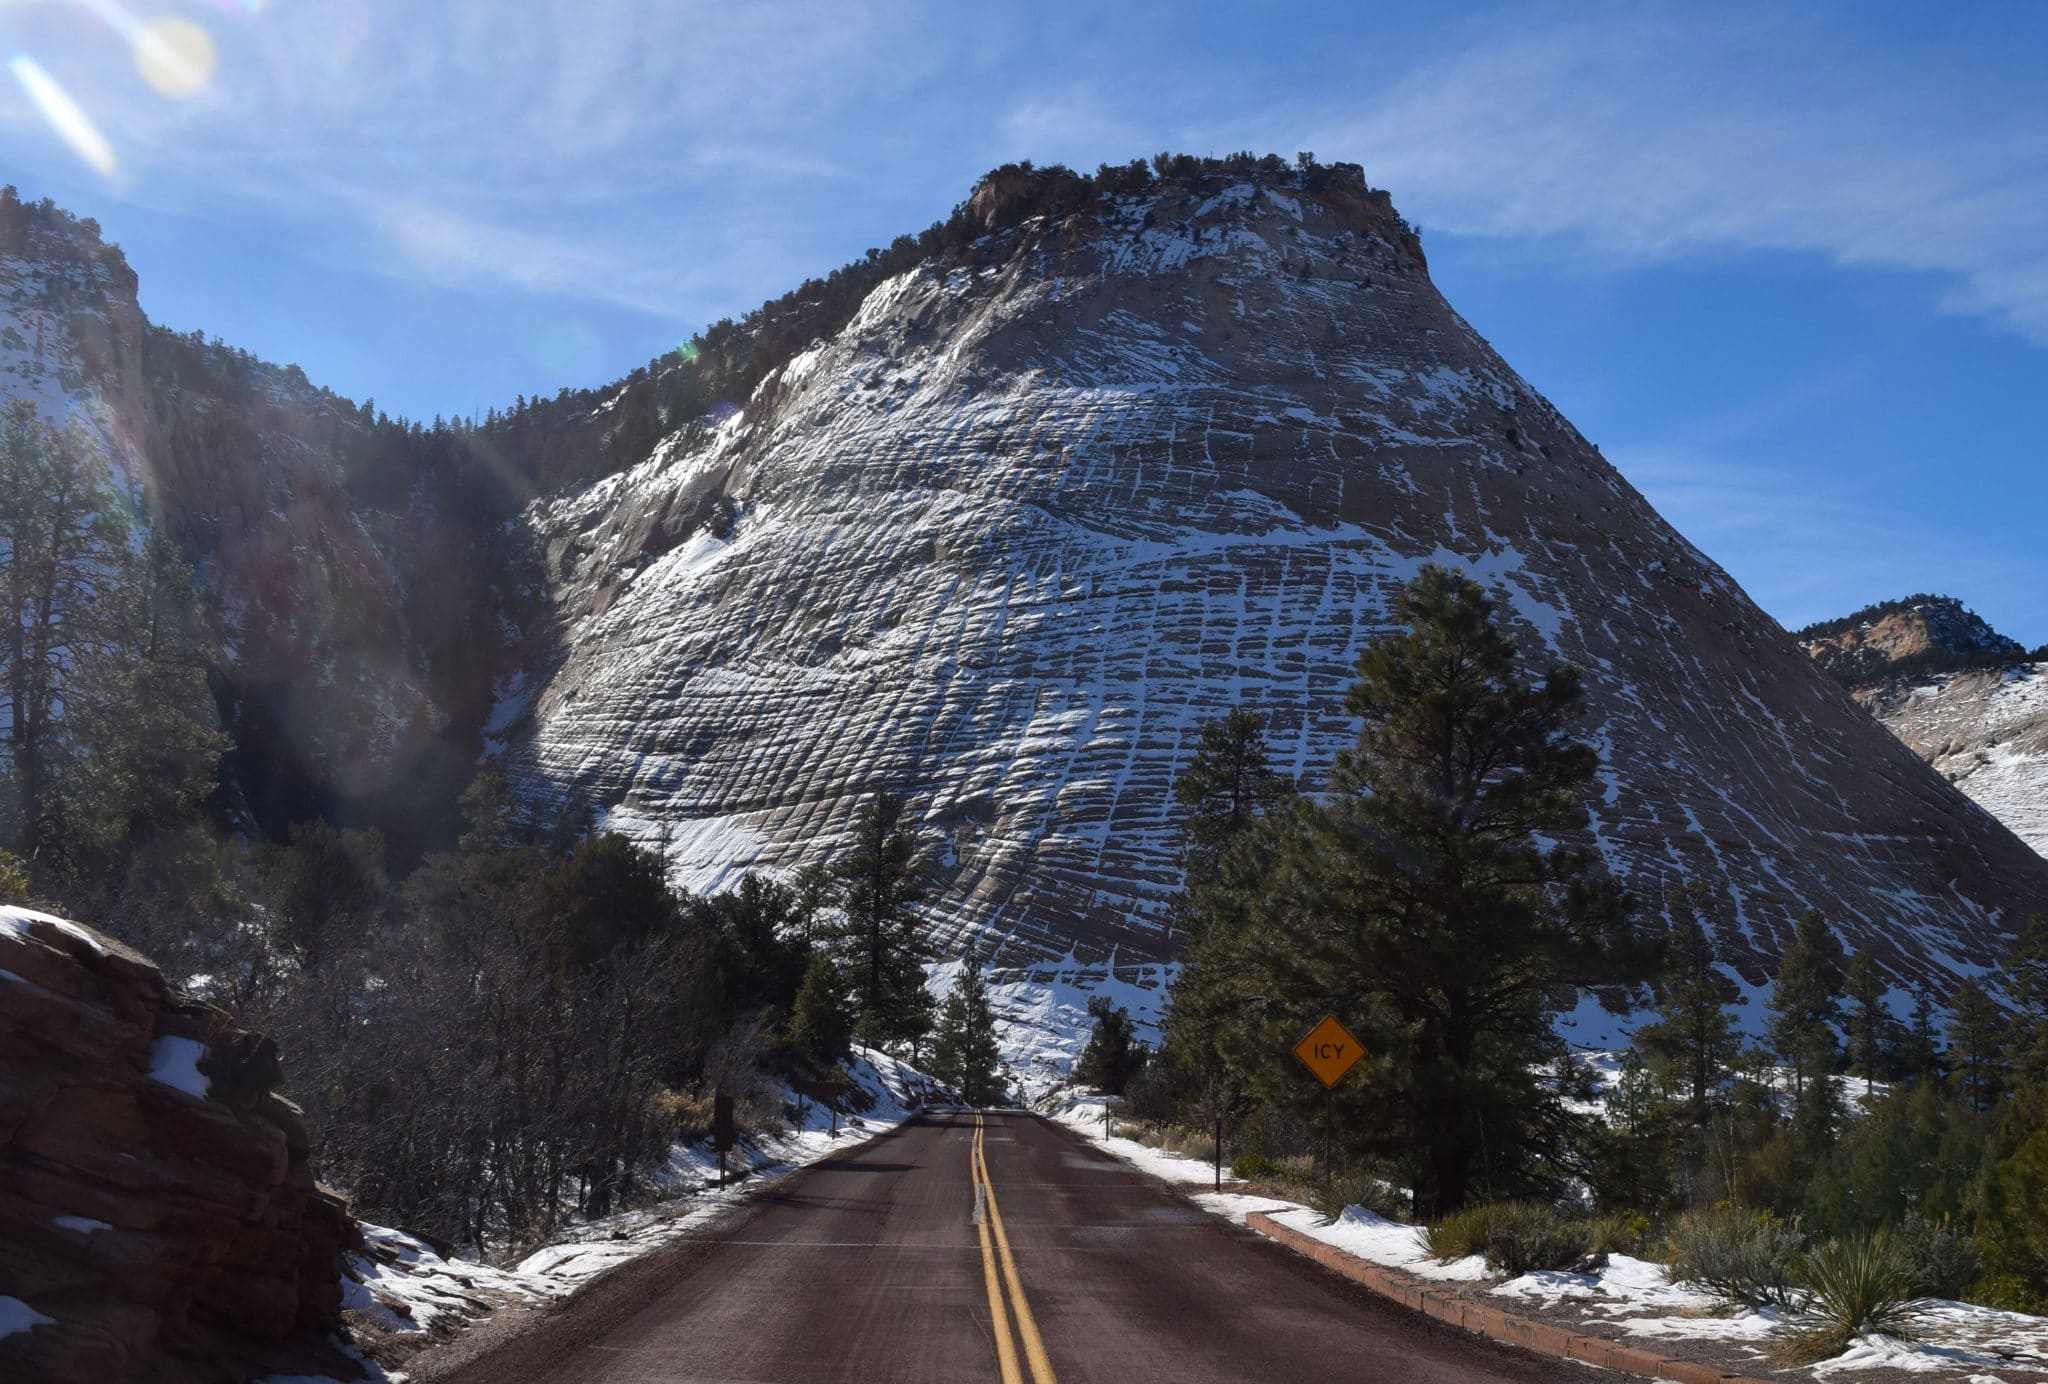
From the junction with the Zion Canyon Scenic Drive, continue on SR 9. The road switchbacks up to the entrance of the 1.1-mile Zion-Mt. Carmel Tunnel, then emerges onto a plateau of cross-bedded sandstone. The main attraction in this section is Checkerboard Mesa (see photo). There’s a signed turnout on the left.
Several miles after leaving the park, SR 9 comes to a T-junction. To return to I-15 or head to the Grand Canyon, turn right onto US 89. Turn left for Bryce Canyon National Park.After 43 miles, turn east onto SR 12 through scenic Red Canyon to the signed turnoff for the park.
To reach Bryce Canyon from the south without passing through Zion (and paying the $30 entrance fee), take I-15 to Cedar City, head east on SR 14, then north on US 89. From Salt Lake City, drive south on I-15, to Exit 95, head east on SR 20 to US 89, then motor south to the park turnoff.
A hell of a place to lose a cow
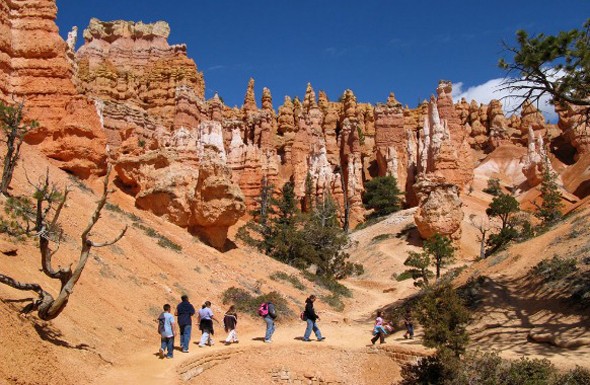
“A hell of a place to lose a cow!” That’s what pioneer rancher Ebenezer Bryce exclaimed when he first saw the area that now bears his name. Unlike Zion Canyon, where you’re down looking up, at Bryce Canyon, you’re up looking down. The “canyon” isn’t really a canyon. It’s the eroded edge of the Paunsaugunt Plateau, which has been eroded into a series of amphitheaters containing the world’s largest occurrence of weirdly eroded hoodoos. Their colors range from pale yellow and pastel pink in twilight or on overcast days to fiery orange at sunrise and sunset.
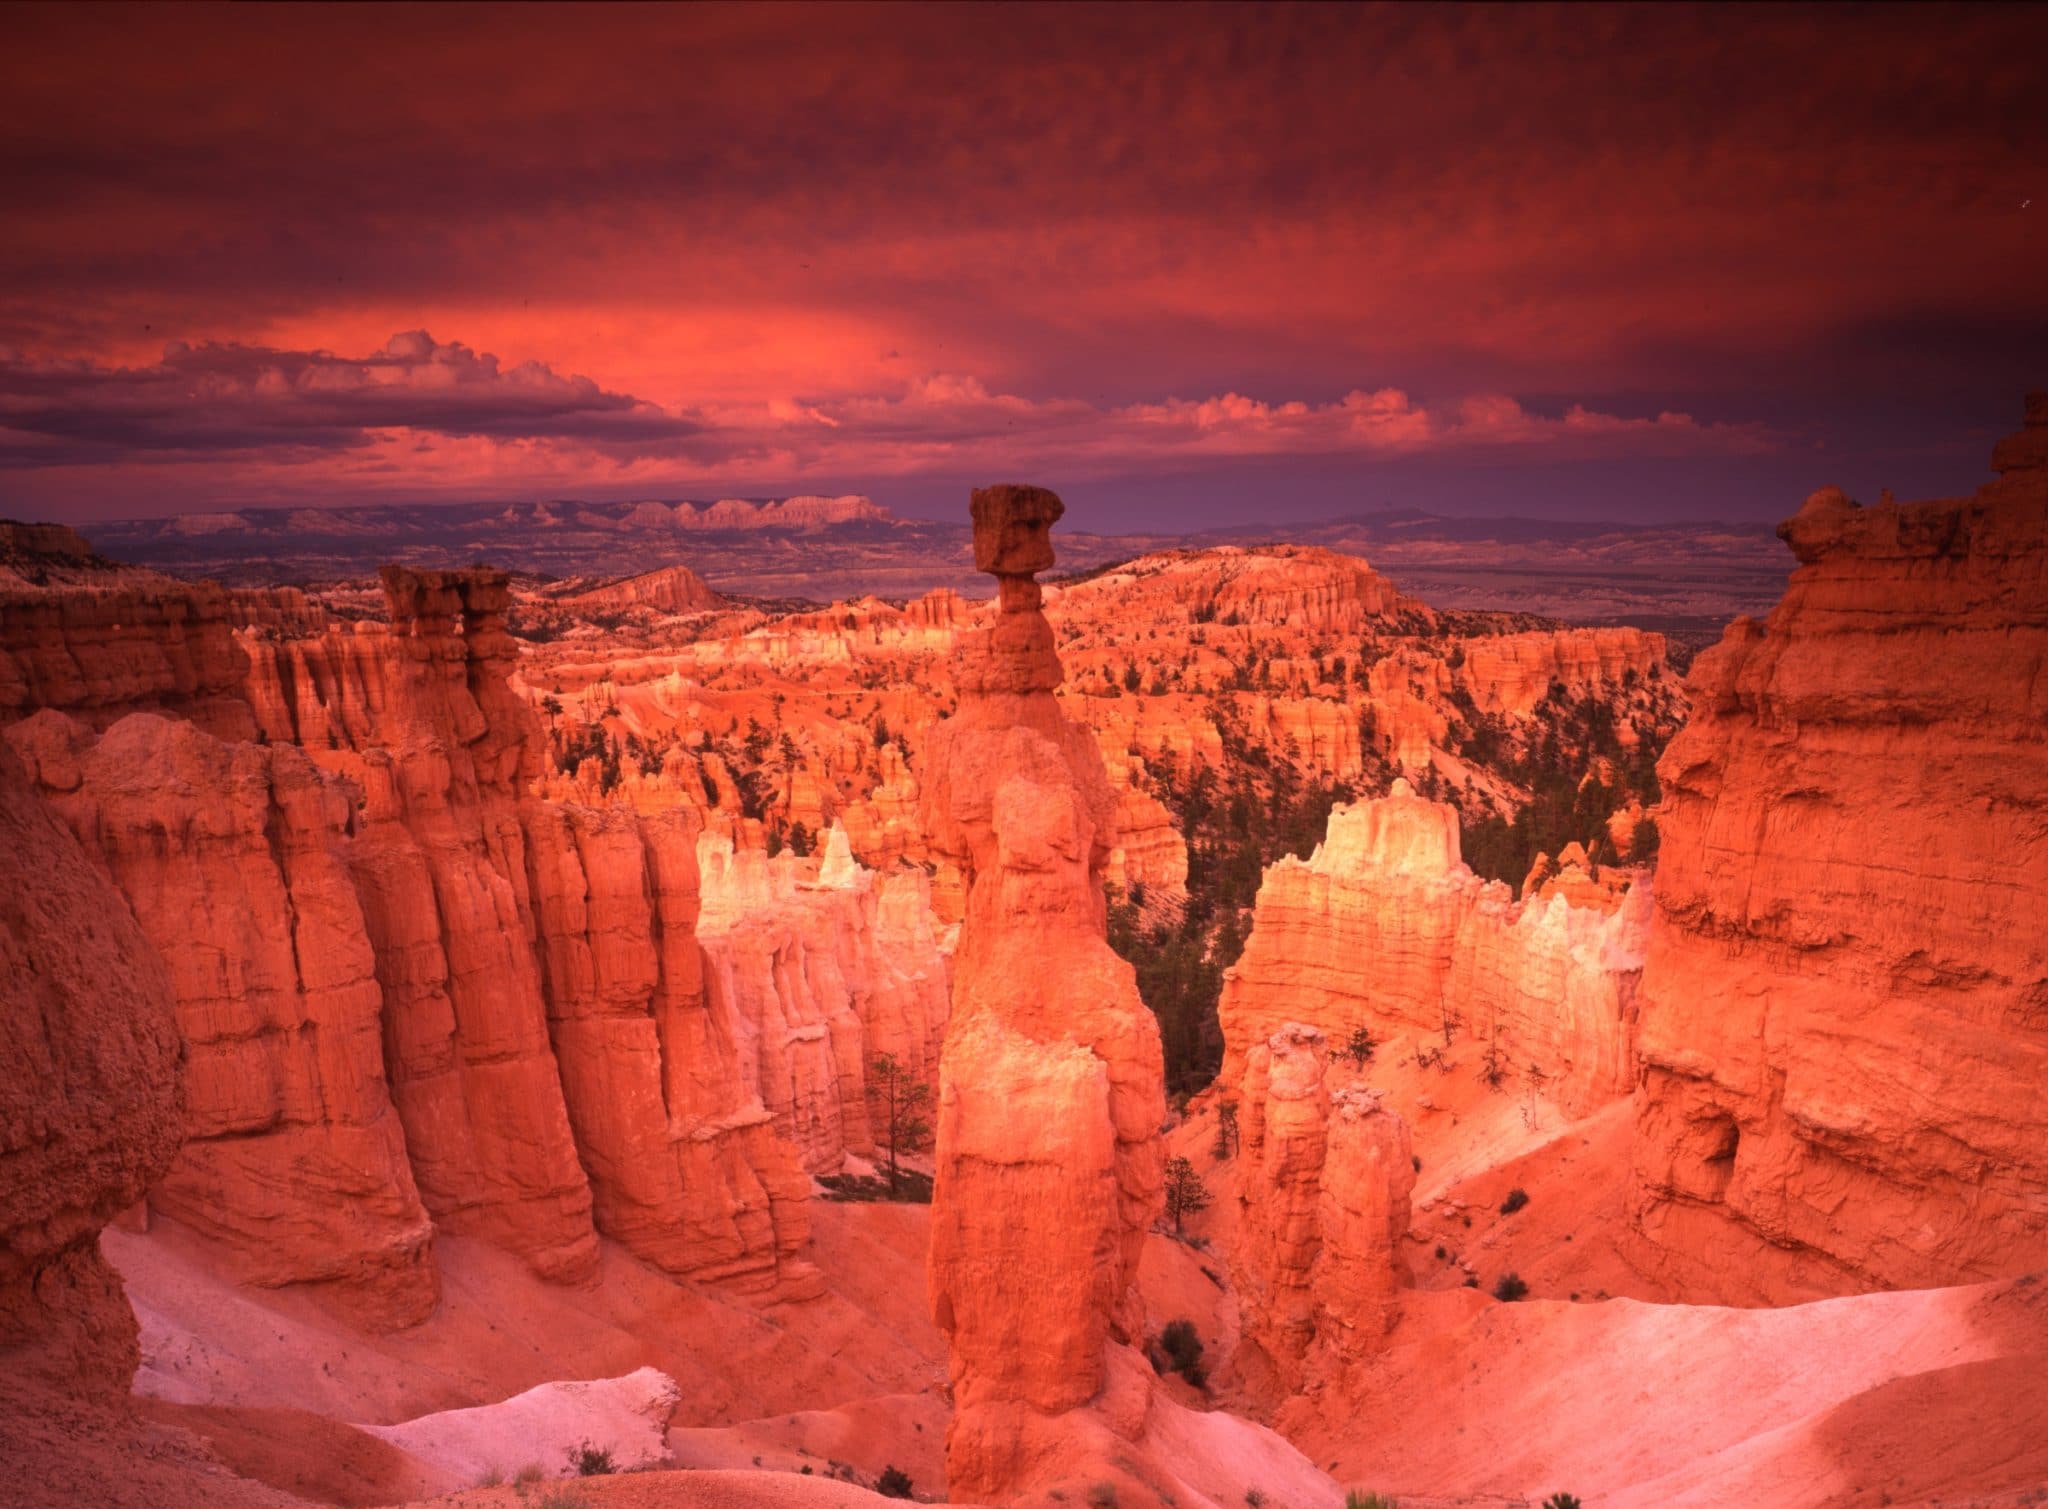
The exposed rocks are a mix of sandstone and limestone. These fanciful stone pillars weren’t created by river erosion. “Water is the active ingredient here,” according to the National Park Service, “but in the form of ‘frost-wedging’ and chemical weathering. For 200 days a year the temperature goes above and below freezing every day. During the day, melt water seeps into fractures only to freeze at night, expanding by 9 percent. Now as ice, it exerts a tremendous force (2,000-20,000 pounds per square inch). Over time this ‘frost-wedging’ shatters and pries rock apart. In addition, rain water, which is naturally acidic, slowly dissolves the limestone, rounding off edges and washing away debris.”
The plateau rim overlooks some of the wildest country in the lower 48. This is the epic Grand Staircase-Escalante National Monument, which is in the process of being eviscerated by our esteemed President. Visibility is amazing . . . for now. It’s common to be able to see Navajo Mountain, 80 miles away. You can clearly see the mountain on the right-hand horizon in the featured photo at the top of this post.
Voluntary shuttle
The park’s web site can be found at www.nps.gov/brca.
Shortly after you enter the park, you come to the recently expanded visitor center. It’s open 8-8 in summer, 8-6 in spring and fall, and 8-4:30 in winter. From there, the park’s scenic drive continues 16 miles to Rainbow Point.
The most popular among the 14 overlooks are Sunrise, Sunset and Bryce Points. All are spectacular.
Bryce Canyon gets crowded, especially in summer. Visitation is about one-third less than Zion’s, but you’ll only run into big crowds at the visitor center and most famous viewpoints, where finding a parking space is a challenge.
The Park Service has implemented a voluntary shuttle service, which I recommend when the park is busy. It takes you to all the most popular viewpoints and trailheads, and you won’t have to troll for a parking space. For details on the shuttle, go to www.nps.gov/brca/planyourvisit/shuttle. From there, if you scroll down, you’ll find details on a free guided shuttle tour requiring advance reservations.
For photographers, it’s easy to take nice photos here, even with a cell phone. What’s challenging, however, is to take nice photos that aren’t exactly the same as everyone else is taking that day. The best photo ops are around dawn and sunset.
What goes down must come back up
What about hiking? Some excellent trails drop down below the rim and meander among the hoodoos. For a guide to day hikes, follow this path from the web site landing page: Plan Your Visit >> Things to do >> Hiking. Please remember: What goes down must also come back up . . . and the elevation here is over 8,000 feet. Be sure to carry water when you hike the trails. Clear, sunny skies are the norm here, so it’s also a good idea to wear a hat and carry sunscreen.
And here is a virtual tour that describes each major viewpoint and its trails: www.nps.gov/brca/planyourvisit/virtualtour. It also includes information on facilities, including restrooms.
An ideal itinerary for a 24-hour visit would look like this:
- Arrive at the park in mid-afternoon
- Stop at the visitor center and check into your accommodations
- Ride the shuttle to Sunset Point and watch the sun go down
- Rise early and drive to Sunrise Point
- Hike the Queen’s Garden Trail.
- Take the scenic drive
Catch the shuttle at Ruby’s Inn
What about accommodations? There’s no Springdale here, but you’ll find a couple of hotels just outside the park entrance. They include the venerable Ruby’s Inn, which has been in business since Moby Dick was a guppy. It’s the staging area for the park shuttle and also offers campsites. There’s a lodge in the park, but what I said about Zion’s lodge is true here – it’s overpriced and not as nice as the properties outside the park gate. Wherever you decide to stay, reservations are a must!
For information on the park’s campgrounds, go to www.nps.gov/brca/planyourvisit/campgrounds.
NOTE: Some of the web links in this post didn’t work during my final test. Try pasting them into your browser, or find links to them from the park’s main web site (under THINGS TO DO). I apologize for any inconvenience. (Sometimes technology can be frustrating!)
That’s it for this week. Please join me again on January 15, when we head to another very special place – Capitol Reef National Park.